 |
| Photo by AimeeSue Photography |
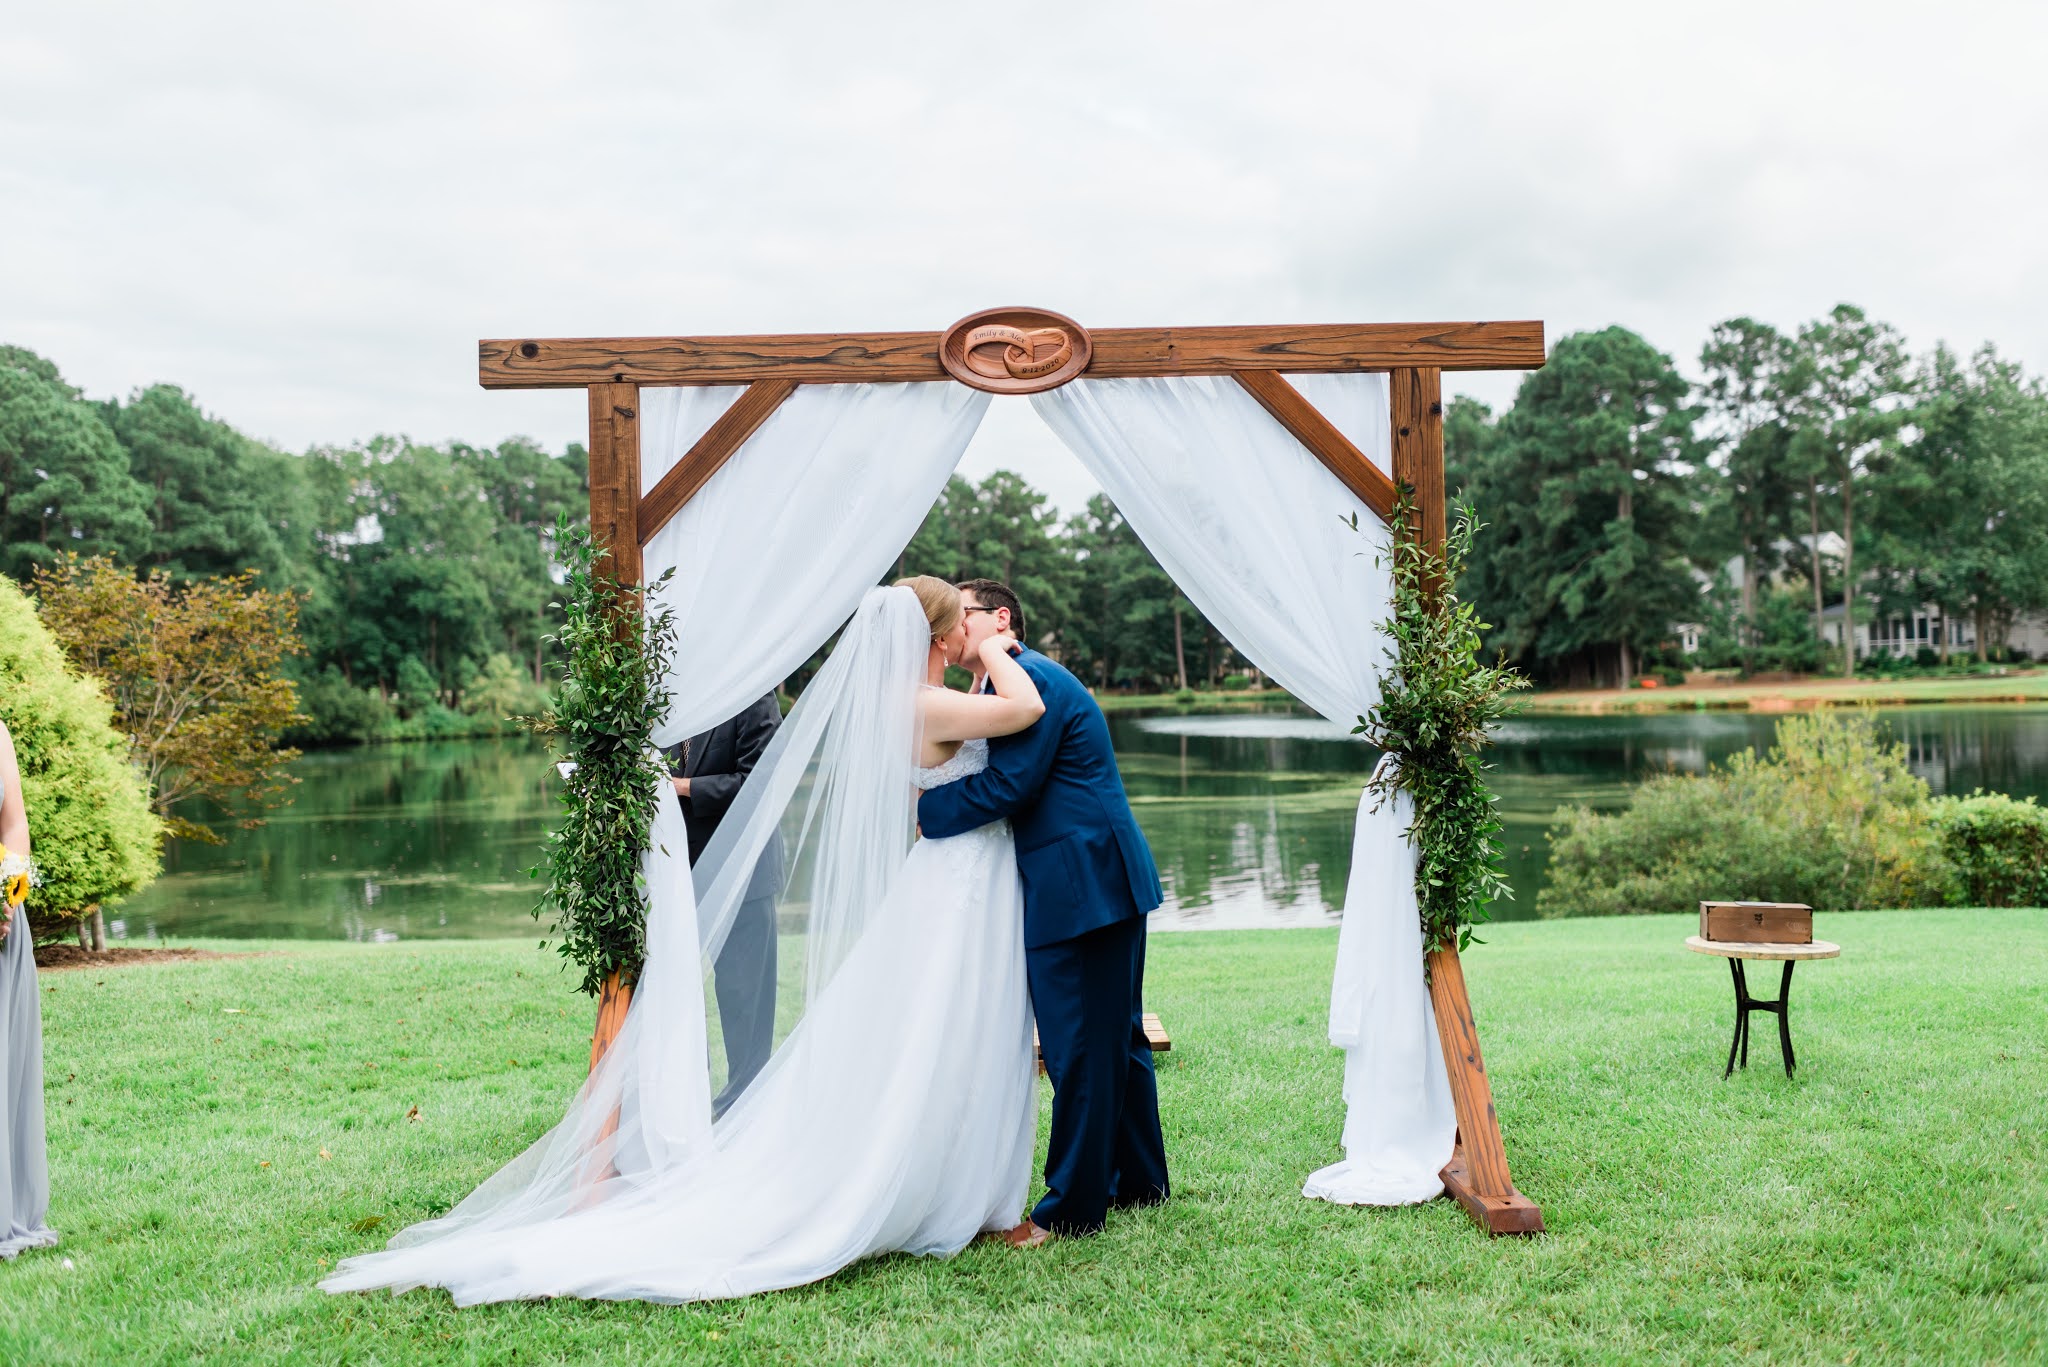
The wedding was originally going to take place in March 2020 at an arboretum on a local college campus and the reception at a downtown museum - due to the pandemic, everything shifted - the new wedding date was now September 12, 2020 and our backyard became the venue.
One thing my daughter really wanted was a veil as long as could be - so we did just that. We made her a cathedral length veil for her backyard wedding - 120" long.


In a previous post, I talked about the inspiration dress, fabrics, lace, appliques and the pattern. Here is how her dress came together.
The inspiration dress:
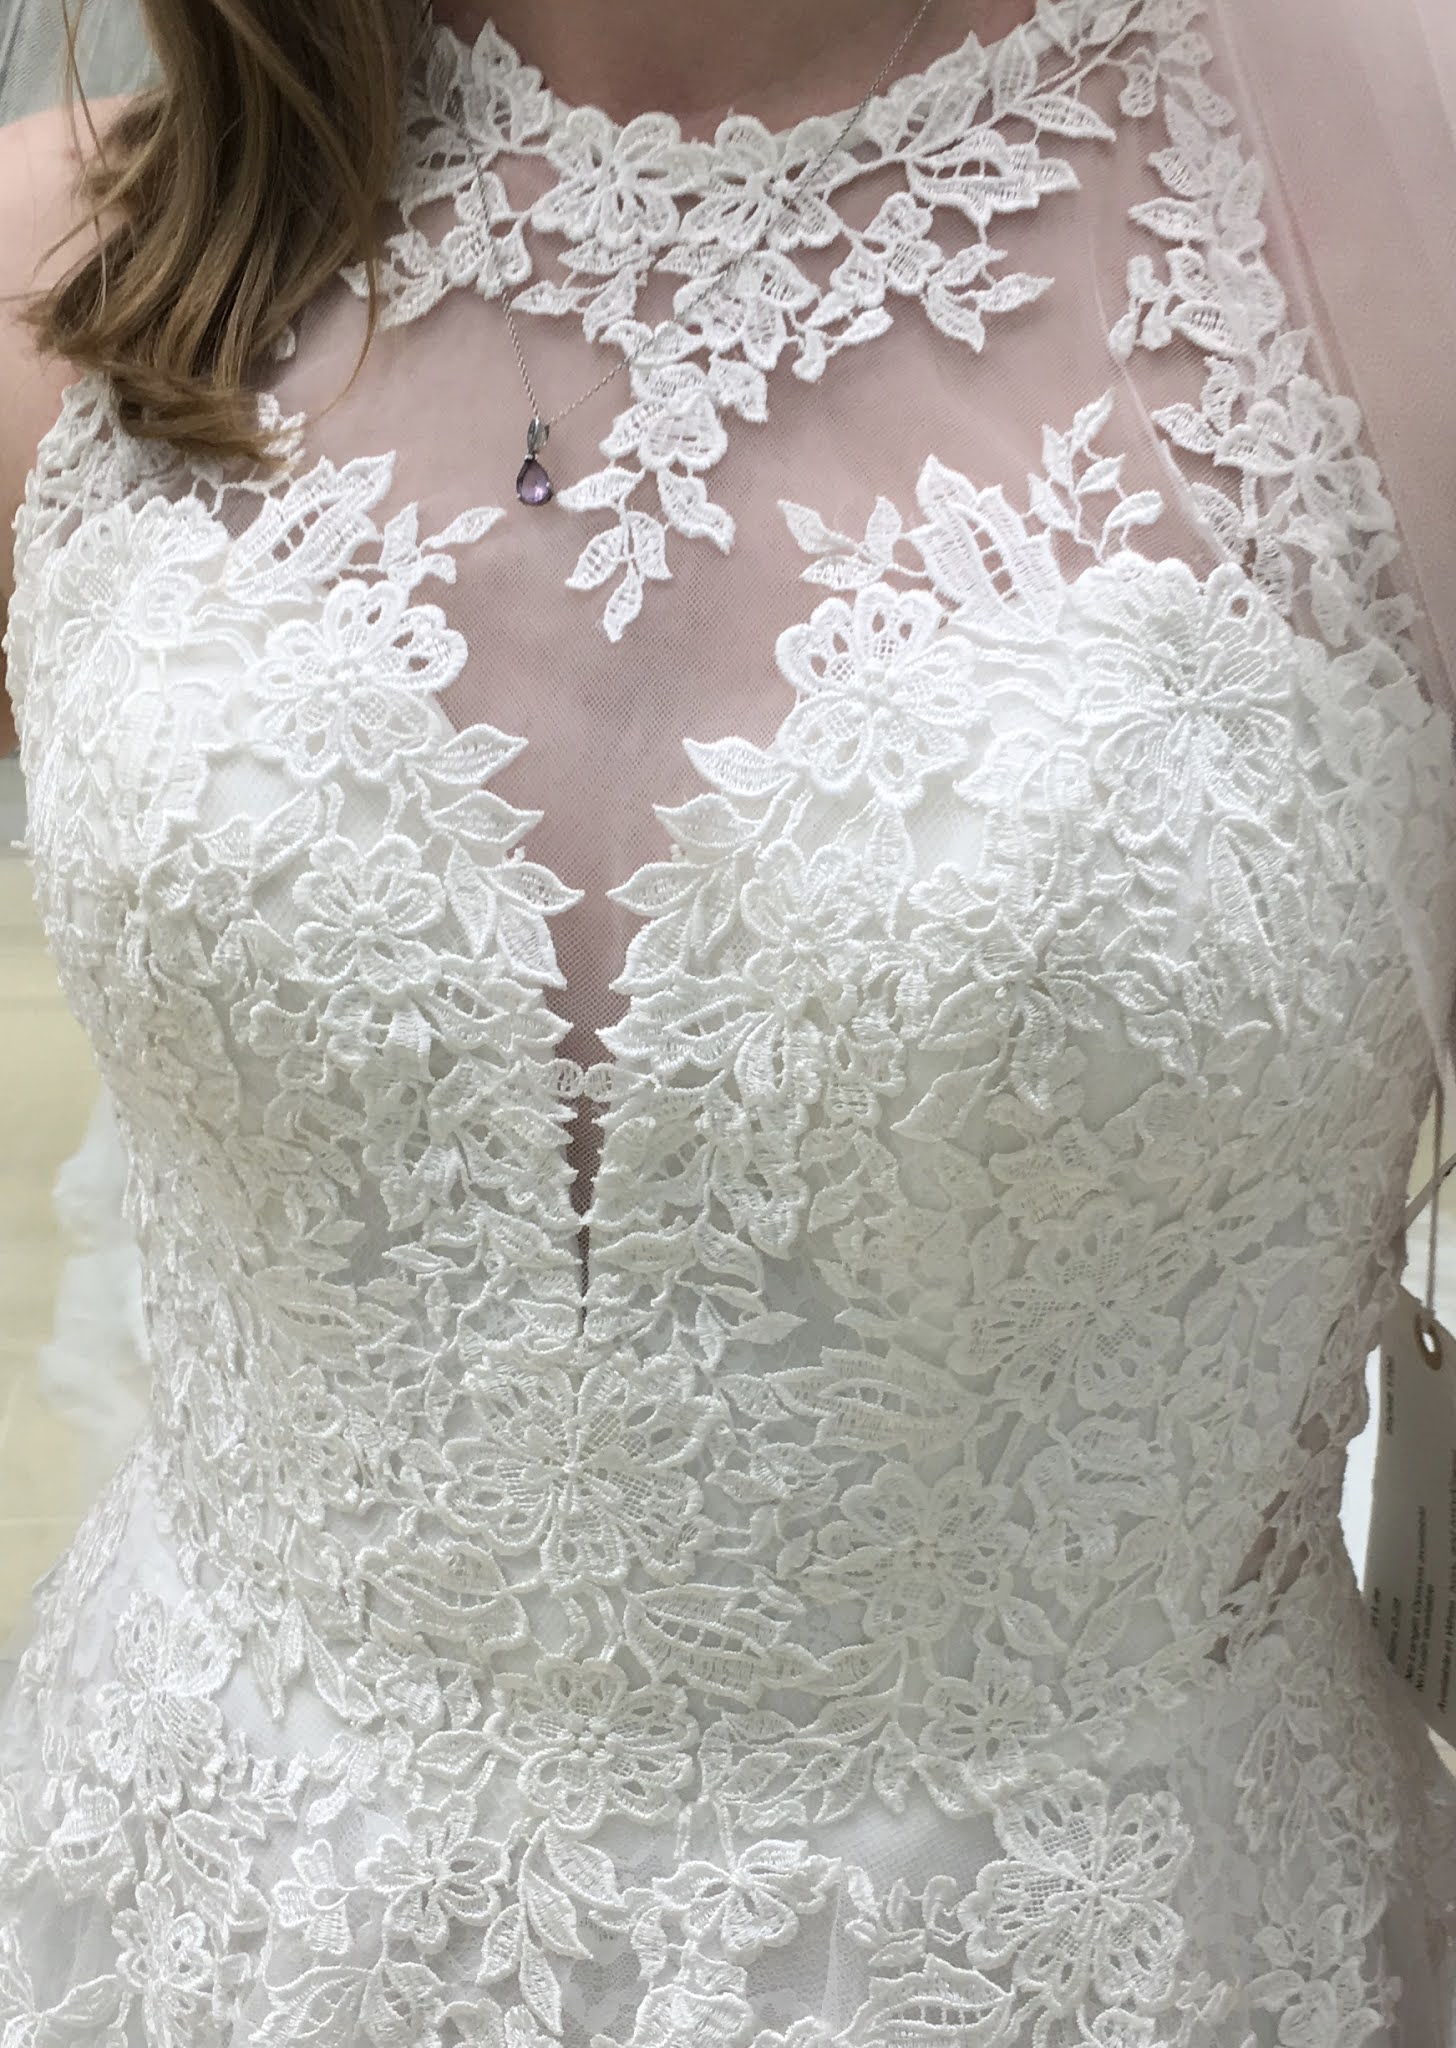

Building the bodice, piece by piece. The front bodice has four sections. Each section consists of a satin base layer backed with batiste interlining and topped with a lace overlay. The lining was built separately and attached after the front bodice was assembled.


The next step was to make an overlay for the front of the dress and the entire back bodice out of dress tulle, neckline trimmed with satin.


The dress skirt was made in a similar way - satin base layer, layered with lace and then a layer of tulle.

With the bodice and skirt together but not yet attached to each other, it was time to get started on the appliqueing.
We searched for appliques similar to what was on the inspiration dress. Here is what we found:
 |
| Ordered 25 mirrored sets |
Starting on the left side, I pinned one applique and then did the same on the right continuing my way down the center of the dress.
 |
| First piece pinned in place on left side |
 |
| Second piece laid out on right side to match left |
 |
| Continuing work down the center. |
From here I worked along the top edge and started filling in the spaces on the main part of the bodice.

 |
Moving to the back, I started working along the center back seam.
 |

The dress was still in two pieces and I really wanted to see it as a whole. This was a good point to do so and would give me a better idea of whether or not I was heading in the right direction. After sewing the bodice to the skirt, I stood back and did not like what I was seeing along the center of the bodice. It looked too jumbled, too much overlap, so I removed some of the appliques and with the help of the picture pinned to my dress form, started again.

The bodice was easier to work with on its own, so I removed the skirt and reattached the appliques.

My second attempt was better, less overlapping in the center.
At this point, I sewed the skirt and bodice back together for a second time, hoping this was the final time. Continuing on the back, I attached the looping and started working along the edges of the armhole, the sides and parts of the skirt.

 |
| Here you can see some of the appliques that hung over the seam line are now attached to the skirt |
 |
| Making progress on the buttons |
Moving on to the skirt - I started working my way around the entire skirt from one side of the zipper to the other.

I cut and pieced an applique along the zipper - with the zipper closed, I wanted it to look like one applique.


We buttoned her up and she married her boy in our backyard beneath an arch made by her dad and a dear friend from the pieces of her childhood swing set.
 |
| Photo by AimeeSue Photography |
Thank you to my sweet, beautiful, smart, witty and incredibly talented daughter for trusting me to make your dress. There were points along the way those appliques were applied with tears, moments I pinched myself, I just could not believe I was working on your dress. You are beautiful in every way, Emily and I love you beyond words.
 |
| Photo by AimeeSue Photography |
No comments:
Post a Comment