Recently, a mom I know was diagnosed with breast cancer and had to have a double mastectomy. I wasn't sure how I could help and thought if she ever needed anything altered to fit, I could do that for her.
This past spring, I received a text from her asking if I could help alter a dress she bought for her son's wedding. I couldn't tell her yes fast enough.
We met and started talking about her dress:
The dress was fitted through the bodice and hip, slightly flaring through the skirt line ending with somewhat of a train. The dress had an open back that came together in the center attaching with one button.
She did not like how the dress sat across the top of her shoulders and neck. The neckline was similar to a boat neck (but only across the front) - sitting above her collar bone, it went straight across shoulder to shoulder. She wanted a more rounded neckline, sitting just below her collar bone.
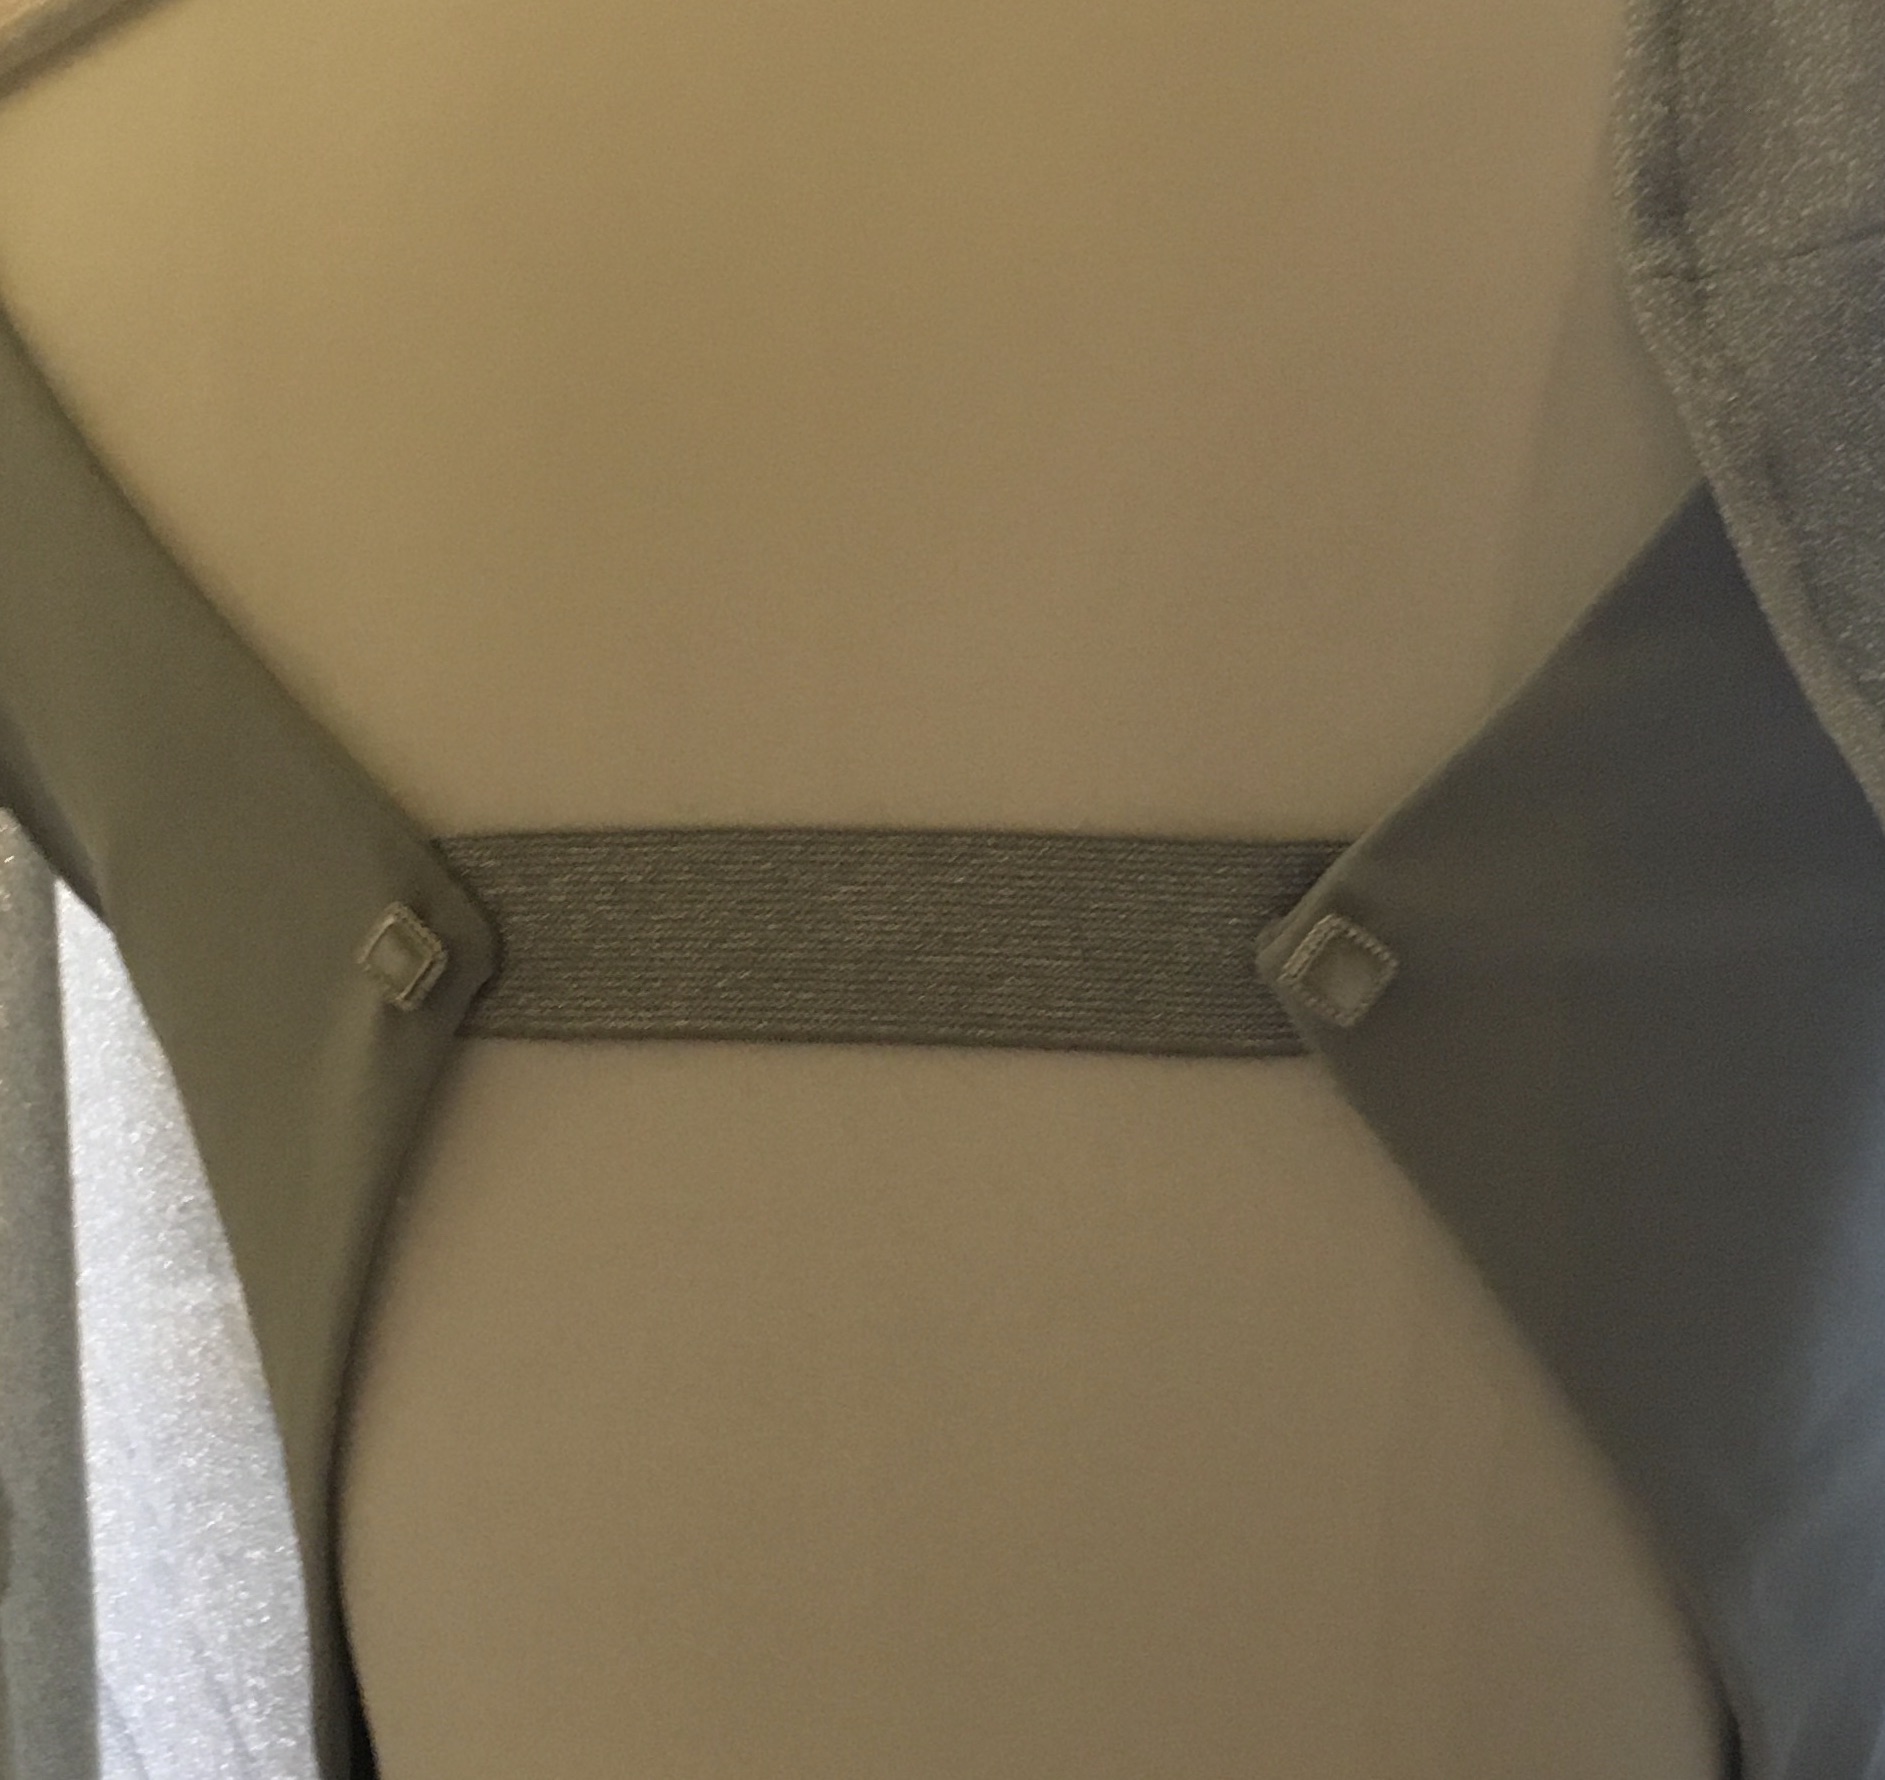
I gently pulled the neckline down to the point she felt most comfortable. In doing so, it changed the back of the dress. There was now a 5" space between the loop and the button, pictured below:
 |
| Button and loop closure on back of dress |
This space needed to stay 5" in order for the front neckline to stay in its new lower position - which was only about an inch lower than the original neckline.
 |
| First back extender made with dress fabric |
To do this, I made an extender using fabric from the train of the skirt. It turned out how I thought I wanted it to until she tried it on - I wasn't sure I liked it or not. I felt the dress needed something different, some kind of detail, embellishment, something. I wasn't sure what until I found 1" wide sparkle/glitter grey elastic trim.
I attached the trim to the lining of the dress - one side sewn, the other was attached with a button sewn to the inside of the dress and a button hole sewn in the elastic.
 |
| Grey sparkle/glitter elastic extender |
 |
| First set of cups pinned in place |
 |
| Positioning second set of cups |
 | ||
Foam cups pinned in place, ready to be fitted
|

 |
| Decorative buttons added to hide exposed stitches |
 |
| The button used to close the wrap is the original button from the back of the dress |
 |
| Cold shoulder opening along each side seam |
 |
| Sheer to show the back detail |
I met Beth a few years ago when our kids were in high school marching band together. We were part of the parent group that dressed the kids, chaperoned the kids, fed the kids and did anything else that needed to be done to get those kids on the field performing. Some of my fondest memories being a part of that parent group include her.

Thank you Beth for trusting me with your dress. You are stunning!
No comments:
Post a Comment