Last week I started searching bedroom closets for a very specific princess dress I made years ago. I was scared I donated it during one of my erratic cleaning moods. BUT I found it in a box I must have had sense to save. This is the very first princess dress I made for my oldest daughter, Emily. It's wrinkled and stained and the sewing is far from perfect. The colors are what her favorites were at the time. What I remember most is her tiny 3 year old arms popping through the sleeves for the first time and her running down the hallway with the back unzipped, giggling a giggle that will be a forever memory. For that reason, this dress is perfect in every way.
 |
Emily's First Princess Dress
|
I've been struggling with how to start this post and finding her dress has helped me. It's been over 20 years since I made this dress.
About 18 months ago, she asked me if I would make her wedding dress. And so that is what we did.
She tried on a few dresses in a few different bridal shops over the course of a few months until she found what she really liked. Actually, she found two dresses she liked. We left the bridal shop with pictures of both inspiration dresses.
 |
Inspiration Dress #1 (left) and #2 (right)
|
Inspiration Dress #1: She liked the front and back bodice and the lace appliques.


Inspiration Dress #2: She thought she liked the waistline but wasn't ready to make a decision so we took a picture knowing we could play during the pattern stage.

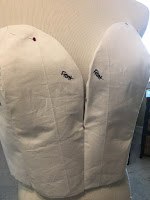
Muslin Pattern -
Starting with the bodice - the front is fabric (muslin now, satin later) with a sheer overlay. The back is all sheer.
Originally, my sweet daughter wanted a very long train so that's where we started.
The pattern phase is the time to try out ideas of what you think you'd like - no matter how extreme they may seem. My advise is to not hold back during this stage because this is the time to try out your ideas. It's so much easier and less costly to make changes during the pattern phase than it is during the dress making phase.
After trying on the pattern, my daughter didn't want the train quite so long so we trimmed some length.
Fabrics -
I knew I wanted to use dress satin for the front bodice and skirt base or underlay, cotton batiste for the interlining of the bodice front, dress tulle for the skirt and bodice overlay and rayon for lining because of how soft it feels. We ordered all of the dress fabrics from VogueFabrics.com:
Dress Skirt & Front Bodice:
https://www.voguefabricsstore.com/mystique-satin-ultra-white.html
Tulle Overlay, Skirt, Bodice (Front/Back):
https://www.voguefabricsstore.com/wholesale-dress-tulle-nt52-white-25-yards.html
Bodice Interlining:
https://www.voguefabricsstore.com/combed-cotton-batiste-white.html
Bodice & Skirt Lining:
https://www.voguefabricsstore.com/ambiance-lining-super-white-121.html?category_id=3426
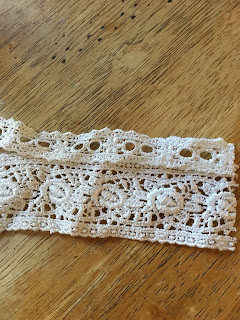
With those on order, we started searching for the lace that was going to be between the satin and tulle on both the skirt and front bodice and the appliques that were going to be added to the entire bodice and upper part of the skirt.
We found the lace and appliques along with the stretch looping & satin buttons at a few different shops on Etsy:
Chantilly lace from FabricTrims.com:
Lace appliques from LaceBeauty.com:
Elastic looping from NapunarWedding.com:
Satin buttons from JL Weddings.com:
And trim from JoAnn Fabrics that was similar to the waistline of Inspiration Dress #2:
At this point, everything was ordered and we had samples of trim to try with the muslin pattern. We played around with the trim for the waistline and in the end, Emily decided she didn't want it added to the waistline or skirt. She really liked the look of Inspiration Dress #1.
Thank you for coming along with me on this journey so far. What might seem like mundane points have special meaning to me, this is more of a journal entry, a way to document this very special moment. Another forever memory as her mom and not just as a seamstress.
My next post will show how her dress came together.


